After getting harassed by my mother in the comments section of my recipe index, I decided it was time for another post. Part of the problem is that we haven’t been cooking super awesome stuff lately. I’ve been pretty busy at work and have just wanted fast, filling, and easy meals. It’s been a lot of stir fry and salads. However, I am currently in Pagosa Springs, Colorado and I have had time and incentive to try some new recipes, many of which have been hanging out in my bookmarks folder for a while now. So here we go!
The first day of our vacation was father’s day and I knew I needed to get up early and make something awesome for my dad. A few days prior to our departure I decided on biscuits and gravy, with a side of pancakes to accommodate those guests who did not want to stuff their face with sausage and cream.
Buttermilk Biscuits

As a relatively new home chef, “cutting in the butter” terrified me. I had made biscuits once before and they were not flaky like I wanted, and I knew it was because of my lack of skills when combining the butter and the flour. I don’t own a pastry cutter, but I think I will change that soon. Anyways, I was nervous, but I made a game plan.
- Put the bowl I would be using for this treacherous operation in the freezer the night before.
- Cut up butter (that had been living in the fridge) and then put it into the freezer to get EXTRA cold, and left it in there until I had stopped hyperventilating.
- Say some prayers to the biscuit and pie crust gods.
- Get to work.
I used Paula Deen’s biscuit recipe because, seriously, I can’t think of anyone who loves butter more than this woman (except maybe the pioneer woman). The only thing I tweaked was that I used buttermilk instead of regular milk.
Ingredients
dry
- 2 cups all-purpose flour
- 1 teaspoons sugar
- 1 tablespoon baking powder
- 1 teaspoon salt
wet
- 8 tablespoons butter, cubed
- 3/4 cup buttermilk
Method
- Pre-heat oven to 425 degrees F.
- combine flour, sugar, baking powder, and salt, then take a deep breath and begin cutting your butter into your flour mixture. Check out this website for the instructions I used.
- Slowly add the milk to your flour mixture and once it has clumped up a bit, do your best to lightly knead it into once cohesive little lump. I had to add a little milk as I went along until it reached the consistency I wanted.
- Roll out the dough as thick or as thin as you like it and cut it with whatever circular, biscuit shaped, object you have laying around. I used a coffee mug and closed my eyes pretending it was a biscuit cutter
- Butter the bottom of a cast iron skillet and place as many biscuits as will fit.
- Cook for about 12 minutes, or until lightly browned on the top.
For me this recipe made 8 biscuits, but this will vary greatly depending on how thin you cut them and how big your circular cutting object is.
Before

For my dad’s biscuit I wanted to do something special, so I used a pine tree cookie cutter to make sure he knew which biscuit was all for him.
After
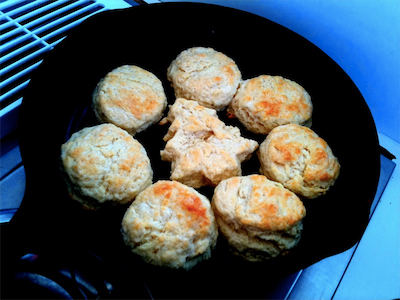
Yay for biscuits!
Sausage Gravy
This recipe was adapted from Paula Deen’s recipe for Sawmill Gravy.
Ingredients
- 1 pound ground sausage
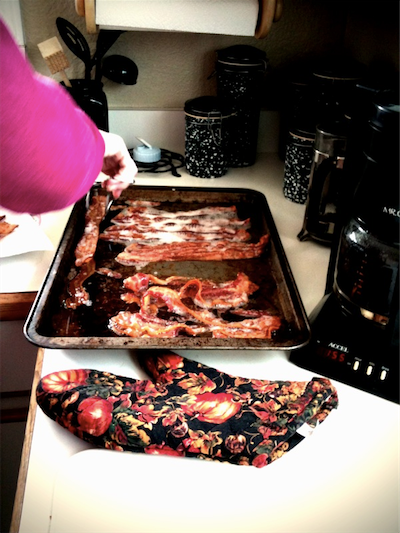
- 2 slices thick-cut bacon
- 2 cloves garlic, minced
- 3 tablespoons all-purpose flour
- 1 teaspoon salt
- 2 teaspoons black pepper
- 2 cups half-and-half
Method
- In a hot cast iron pan, or a non-stick skillet, throw in the sausage, bacon, and garlic. Cook, over medium heat, until the sausage is crumbly.
- Once the sausage was done, I removed the bacon strips because all I wanted was a hint of that awesome bacon flavor.
- Next, combine the flour, salt, and pepper and stir that into the sausage mixture.
- Stirring constantly, cook for 1 minute, then little by little, stir in the half-and-half.
- Continue stirring constantly until the mixture has thickened.
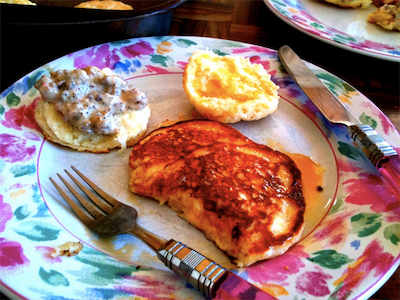
- Serve hot, preferably on top of biscuits.
Unfortunately I don’t really have any pictures of it other than the first picture of this post. It was, however, amazing. The original recipe called for 2 tablespoons of butter to be stirred into the gravy once it had thickened, but, I deemed that unnecessary.
Seriously One of the Best Buttermilk Pancakes I’ve Ever Had
I originally saw this recipe on the Evil Chef Mom blog and it was titled the best ever buttermilk panackes and I have to say I completely agree. This will probably be my go-to pancake recipe for a while.
Ingredients
dry
- 1/2 teaspoon baking soda
- 2 teaspoons baking powder
- 1/4 teaspoon salt
- 2 cups all purpose flour
- 2 tablespoons sugar

Look everyone, the dry ingredients…they’re socializing.
wet
- 2 1/2 cups buttermilk
- 2 large eggs
- 2 tablespoons vegetable oil

Oh and here we have the wet ingredients hanging out in they’re pre-whisked states.
Method
- In a mixing bowl combine all of the dry ingredients and mix them together with a whisk.
- In a different bowl, whisk all of the wet ingredients together.
- Slowly, in small-ish batches, incorporate the wet ingredients into the dry. DO NOT I repeat do not over-mix these pancakes. Only mix it enough to get most of the dry mixed into the wet. LUMPS ARE GOOD PEOPLE.
- Let this batter sit in the fridge or on the counter, depending upon how cold/hot it is where you are, for about 30 min to 1 hour. This will allow all the ingredients to get to know one another really well and provide you with a wonderful pancake.
- Heat a large pan, I used a cast iron one, over medium-high heat.
(So, since we were on vacation, I didn’t have any of my pots and pans to cook with, and I was left maneuvering a large cast iron pan that wasn’t seasoned, super bummer…EVERYTHING stuck to it. Because of this fact, I used a pretty huge amount of canola oil in the pan with every batch to ensure there weren’t too many messy looking pancakes. This lead me to the realization that the key to lightly crispy pancakes is..OUTRAGEOUS AMOUNTS OF OIL….noted.)
- Once your pan is hot,( I suggest doing a tester pancake) pour about a 1/4 of a cup of the batter into it.
- Flip pancakes once they show a good amount of bubbles along the surface.
- Stuff your face.
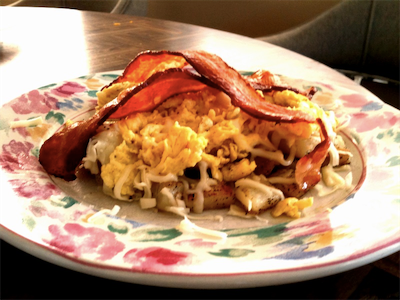
And then it all comes together. Horray!.
I hope everyone enjoyed their father’s day!!